Saturday, October 25, 2014

Prosciutto Brie Pizza with Arugula and Walnuts


This pizza was inspired by a pizza at Cibo in Phoenix. If you live in Phoenix or you're visiting, please consider going to this pizzeria. I think that it is my favorite pizzeria anywhere! And if you can control yourself, they have amazing crepes for dessert. I know that most people want to go to Pizzeria Bianco when visiting downtown Phoenix, and they do have delicious pizza. But I think Cibo's pizza definitely rivals Pizzeria Bianco, and they are in a really great restored bungalow that just oozes charm. The biggest bonus is that you won't have to wait 4-6 hours for a table. 

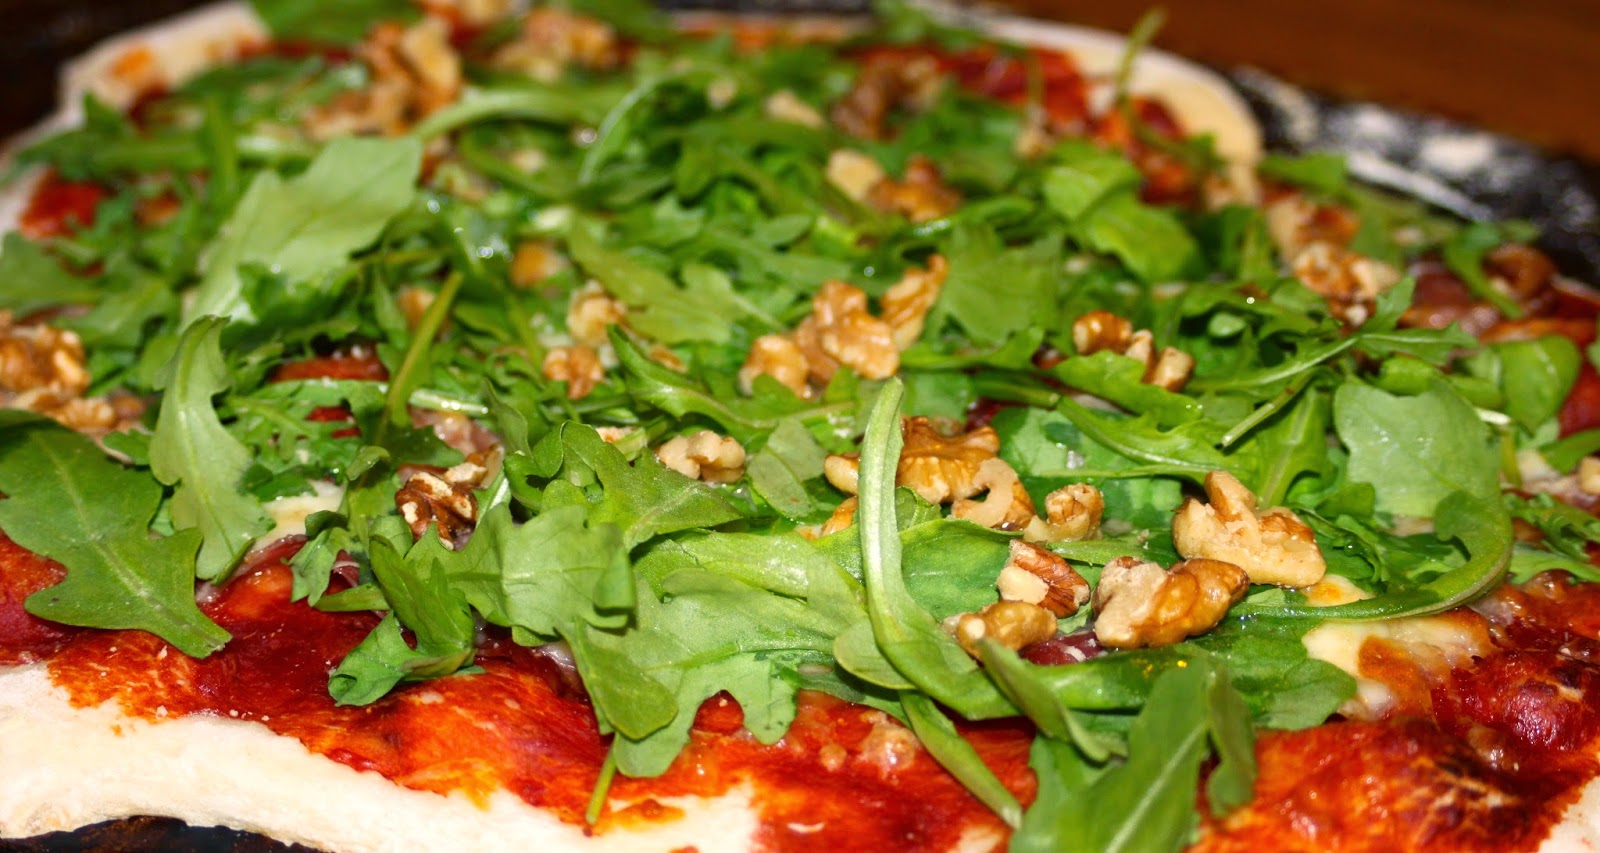
Okay, back to the pizza I made. It was inspired by the La Noce which has tomato sauce, mozzarella, ricotta, arugula and walnuts. I put my spin on it based on ingredients I bought for this Skinnytaste dish that I'm going to try tomorrow night. 

I took the photos before I tasted it hoping it would be good enough to put on here. It was a huge hit with both Joe and me, and he encouraged me to put it on the blog so you might all enjoy it as well. I hope you try it, and then hop on and leave a comment letting us know what you thought of it. 


Prosciutto Brie Pizza with Arugula and Walnuts
Ingredients
Corn meal
Pizza dough
1- 6 oz. can tomato paste
4-6 slices prosciutto
1/2 cup shredded mozzarella cheese
2 oz. brie
1-2 cups baby arugula
1/4 cup walnut pieces
walnut oil or extra virgin olive oil to drizzle

Preheat oven to 425˚. 

Sprinkle corn meal over the pizza pan. Roll pizza dough out to your preference and place on pizza pan. I chose to do this one as thin as I could roll it. Spread a thin layer of tomato paste over the whole dough. Cover the tomato sauce with the slices of prosciutto. Sprinkle a thin layer of shredded mozzarella. Cut the brie into thin slices and place every 2 inches so it has room to melt. 

Place in oven for 12-15 minutes until the cheese is melted and golden. If you are using a thicker crust, you will either need to prebake the crust or lower the oven temperature to 400˚ and leave it in for 20-25 minutes. 

Remove the pizza and immediate top with arugula and walnut pieces. Finish by finely drizzling the oil over the whole pizza. 

Wednesday, October 15, 2014

Cleaning up the front Door


Why, oh why didn't I take a before picture? I mean, the front door was a complete mess. The trim paint was peeling, there was a 1 inch gap above the door that needed to be filled with Big Gap Filler, and the metal lintel was quite rusted. I did get some in-progress pictures though.

This project spanned several months. The first thing I noticed was the large gap between the top of the door and the lintel. The only thing keeping the cold air out in winter was the interior wood trim. So I found Big Gap Filler at Lowe's which is just what it sounds like. It is an expandable foam that hardens in place after it is sprayed in. You can trim off the extra to make it flush with a surface.

The next step was what I thought was going to be the final step. (Oh was I wrong!) I was going to just go out in one afternoon and scrape off the old paint, do some light sanding and then paint a fresh coat of white. Oops! That wasn't happening. What seemed like an afternoon job turned into 5 weekends involving both Joe and me.


I did scrape the peeling paint off pretty easily, but along with that came the original caulking. Aw man, that wasn't good! Of course some of the caulk came off quite easily and some needed a lot of scraping. Next came sanding the wood, and we're not just talking the light sanding I was imagining. It was definitely time to pull out the trusty mouse electric sander. Joe got involved here and did a great job sanding the wood trim. You can see how smooth it came out. 

Isn't that nicely sanded?


We scraped and sanded the metal lintel so that I could epoxy and paint that too. This was in rough shape. You can see in the picture above how it looks after the scraping and sanding. I also sprayed a rust stopper and put an epoxy in a gap on the front side.

This shows the epoxy well. It was a pain to apply, but I was able to sand and paint the finished product.

After scraping, sanding, epoxying and taping, I finished the prep work with a paintable exterior door caulk. I caulked over the Big Gap Filler to provide a smooth paintable surface and an extra layer of sealant. I also caulked along the window edges and joints of two pieces of wood. Phew! The prep work was finally finished, and now I was ready to paint. It only took me 5 weeks longer than I was planning. You can see the final results below.


Oh if you could only see how it looked before. 

I'm very happy that this project is done. We don't use our front door much, but I'm glad that we put in the time and did it right. I'm also hoping it will improve our heating bill this winter with the extra insulation and caulk. I'm looking forward to having a nice place to showcase some pretty wreathes in the upcoming seasons.

~Katie

Saturday, October 4, 2014

Book-themed Baby Shower

My sister Emily and I threw a baby shower for our little sister Jen. She is due with her first boy in November! Yay, yay, yay! It worked really well though, because I did most of the cooking, and Emily did the decorating. It was also at Emily's lovely house, so she had the added stress of cleaning and hosting. Thanks Emily! This really worked to our strengths which is always nice. It makes the whole process more enjoyable.


Didn't Emily make it look so adorable?

Party favors!

For the food, I found some several children's books which had some yummy food connections.


Cloudy with a Chance of Meatballs: Cocktail Meatballs

Blueberries for Sal: Blueberry Muffins

Stone Soup: Thai Curry Butternut Squash Soup and Veal Dumpling Broth with Escarole

Green Eggs and Ham: Guacamole Deviled Eggs from Skinnytaste.com

Everyone Poops: Tootsie Rolls

And I'm totally kicking myself for not getting a picture of the cake during the shower. My mom made such a delicious carrot cake which I paired with Peter Rabbit. I can assure you it was delicious. 

Thanks to everyone for making it such a special day for Jen and baby!