Saturday, November 21, 2015

Goodbye Fluorescent Lights!

I know that fluorescent lights are relatively cheap and hugely popular in 1974 when our house was built, but yuck! Ooooh how I hate them in my house. They are fine in a classroom, but over my kitchen table? Nope! No thanks. This light had to go. It's been flickering since we moved in even with new bulbs. So instead of replacing the ballast, it was time to just replace the light. 


This thing was a beast. Joe helped me take it down. It had a built-in frame held into the ceiling with 4 giant screws. 


You can see the holes where the screws were and the rectangle of the former light. It's so pretty isn't it? You can see why this had to go.


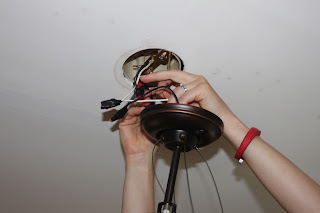
I started by installing the base of the new light fixture. I'll admit right now, I should have done a little more research on new light fixtures. I like the fixture I got; however, I wish I would have gotten a slightly bigger light fixture for the room over the table. I may replace it again some day, but for now, it's a million percent better so I just don't care!

See what I mean? Isn't it so much nicer?

Clearly I still need to take care of the holes and paint. It took me forever to finish because I just didn't want to deal with moving the rug from under the table to paint. But, I finally moved the rug and got a move on the final details. I started by filling in the holes with spackle. I really let it dry well before I sanded it flat. Finally I painted the entire ceiling with a basic Lowe's ceiling paint.

Before                                                                         After

One final vanity update!

So if you're counting, this is my fourth vanity painting in this house. That's right, we have four bathrooms that all had original 1974 vanities. I've discovered that the easiest/cheapest way to give the entire room an update is to paint the vanity. It really brings it into this century for about $10-$15 and some elbow grease.

I start by taking the doors off and washing everything well. I use my favorite primer, Zinsser Bulls Eye 1-2-3 as a base coat. 


After the primer, my sister-in-law and I painted the whole thing white. I just used a Better Homes and Gardens basic white that I had downstairs. I put new hinges and knobs on, and that's it! I just love how much fresher and better it all looks. Now unless I decide to change the colors, all of the bathrooms are "done" for now!


Pumpkin Oatmeal Waffles


I can't take credit at all for the idea of adding pumpkin to my oatmeal waffle recipe. My friend Jessie texted me the other night telling me that she added half a can of pumpkin to the original waffle recipe. So of course I had to try it this morning. It turned out to be very tasty indeed! Wonderful idea Jessie!

For those of you that love pumpkin, this is perhaps the perfect autumn breakfast recipe for you. For those of you looking to sneak more veggies into your diet, this is a very easy addition. 


I mixed up a batch of the batter in my KitchenAid stand mixer this morning. I have a Belgian waffle maker that I use. After making waffles every week for two years, I've discovered for my waffle maker that 2/3 cup is the perfect amount.  Without further ado, here is the recipe


Pumpkin Oatmeal Waffles
3 c. flour
2 c. quick cooking oatmeal
2 Tbsp. baking powder
1 Tbsp. ground flax seed (Optional, but I love the texture it adds)
1 tsp. cinnamon
1/2 tsp. salt
4 eggs, beaten
3 c. milk (any kind)
6 Tbsp melted butter
1 Tbsp. vanilla extract
4 Tbps. brown sugar
1 cup pureed pumpkin

Kitchenaid Stand Mixer directions:  Add eggs, milk, butter, vanilla extract, pumpkin, and brown sugar to mixing bowl.  Mix on medium speed for about one minute until completely mixed and brown sugar is dissolved.  Add flour, oatmeal, baking powder, flax see, cinnamon and salt to liquid.  Mix for another minute at speed 2.  Scrape down the sides and mix for another 30 seconds.  Pour into a hot waffle iron; close lid quickly and open when done.  

Regular directions: In a large bowl mix together all of the dry ingredient but the brown sugar.  Set aside.  In another bowl mix eggs, milk, butter, vegetable oil, vanilla extract and brown sugar with a whisk.  Pour the liquid ingredients into the flour mixture.  Mix with a wooden spoon until blended.  Pour into a hot waffle iron; close lid quickly and open when done.  

Makes 8-10 six inch round waffles.